Showing posts with label gift ideas. Show all posts

Thursday, February 7, 2013

Carseat Covers

I have two sister-in-laws having babies this spring, so I made carseat covers for them. The one on the right is supposed to be for a boy. The one on the left is supposed to be unisex, but it was so hard finding fabric! I ended up thinking the mushrooms were a little girly, and the other was a little too boyish, but oh well. I love how they turned out either way.

 I found the pattern on Etsy. I love that it has a button front so you can peek in, but still keep the little ones covered if you want. Her pattern was great, but I made a few changes. She used Grossgrain ribbon everywhere, but I decided to pipe it. I'm getting more confident with my piping skills. For the red one, I made my own bias tape and covered store-bought piping to make it a little more special. (Thanks to my sister for the idea)

 Buttons! Sometimes it's the embellishments that end up costing the most. 

Straight from Little House on the Dairy.
Moo.

Monday, November 5, 2012

Quiet Book, Pt. I

Phew. Just finished this baby. Making a quiet book like this is a bit like childbirth. A lot of work in the moment, and you're sooo glad when you're done. But so worth it in the end, of course.

I thought it would be great to make something homemade for Annie for Christmas, and I've had my eye on tons of quiet book ideas for ages. I came up with some of the ideas on my own, but I got most my inspiration from blogs and Etsy. I think the important thing is to just do it how you like it, and tailor it to your kid's needs.

I really wanted to make this so the pages are removable. That way I could divvy them out among a few kids in the future, without fighting over one book. I just bought book rings at Walmart and made button holes in each page. They measure about 9x12" before finishing. Also, if she outgrows a page or ruins it, it's easily replacable. 


Pages 1 & 2:

I originally found the idea for this one here
Tying is a little advanced for a 1 1/2 year old, but I thought it was cute. I pretty much winged the shape of the ballet shoe out of felt. I had some leftover black ribbon from my party, so that's what I used for the ties. I added a little decorative stitch on the ribbon for fun.

Button flowers. I just used scraps I already had around my sewing room. The blue was actually already pieced like that, so I just cut out my shapes, sewed the blue to the green, and made my stems. The key on this one is to use all the same button sizes so all the flowers are interchangeable. I have an automatic button hole on my machine, so when I figured out the size of the first one, I was able to do all of them after that without adjusting anything. 


Pages 3 & 4:

Originally found the idea a few years ago on Homemade by Jill. Love her. Once again, I just winged it. I could have used ribbon as a border, but I didn't have any so I just zig zagged on some felt I cut into thin strips. The top window pops down and opens too. The finger puppet templates are also on Jill's website.

Mmm. Pie. I originally found this idea on a food-themed quiet book here, which was cute. This is a fun weaving activity. I used my pinking shears to make the zig zag edges on the crust. I love the food fabric underneath.


Pages 5 & 6:

My kid is mildly obsessed with Yo Gabba Gabba. So of course, I had to make DJ Lance's boom box. This page was tricky because I had to rig it so it would open up. I ended up just making a whole separate boom box that was a tiny bit smaller, and attaching it to a base page that was the right size. See the base page? It's that orange/red print you can barely see.

Are those not the cutest finger puppets ever??
I kind of guessed on the sizes after doing the barn animals. I embroidered on the details, like Toodee's mouth and Brobee's stripes. Pretty sure this is my favorite page. 

Original idea here
I wanted to do other root vegetables, but I made the pockets too small so I had to stick with all carrots. I did the button holes in the brown first, and sewed pockets after using a piece of fabric on the back of the page. I put a tiny piece of floral wire between the front and back sides of the carrots, so they would be stiff enough to poke down the holes.

And that's it for today.... More quiet book to come.

Friday, October 19, 2012

Chapter Book Bag

By Kathryn 

For birthdays lately, I have been making purses for my daughter's friends. It's cheaper, cuter, and way better than some toy that will be lost or broken. 

This one is for Hannah- she loves fairies and baking.


It has a ruffle flap. 

And a pink, secret pocket

This is the strap-- a trim I had leftover. 
Using trim or rick-rack is SO much easier and quicker than making a strap from fabric!

We personalized it with an appliqued "H." 
(I didn't do a "D" last time- curves are much harder!)
I interfaced the orange square, the letter, and the fairy fabric, to add strength. 

My favorite part about this project is working with my daughter on it. She really wants to learn to sew, and it's fun to share the skills. 

I also loved that we used no pattern, just ideas I had done before.
It's great to be able to make it just the width and length we wanted.

One more thing that made it nice? All the materials were from my stash. 

It's a quick, unique, personal gift we know she will love!


Monday, February 13, 2012

Last Minute Valentine Ideas


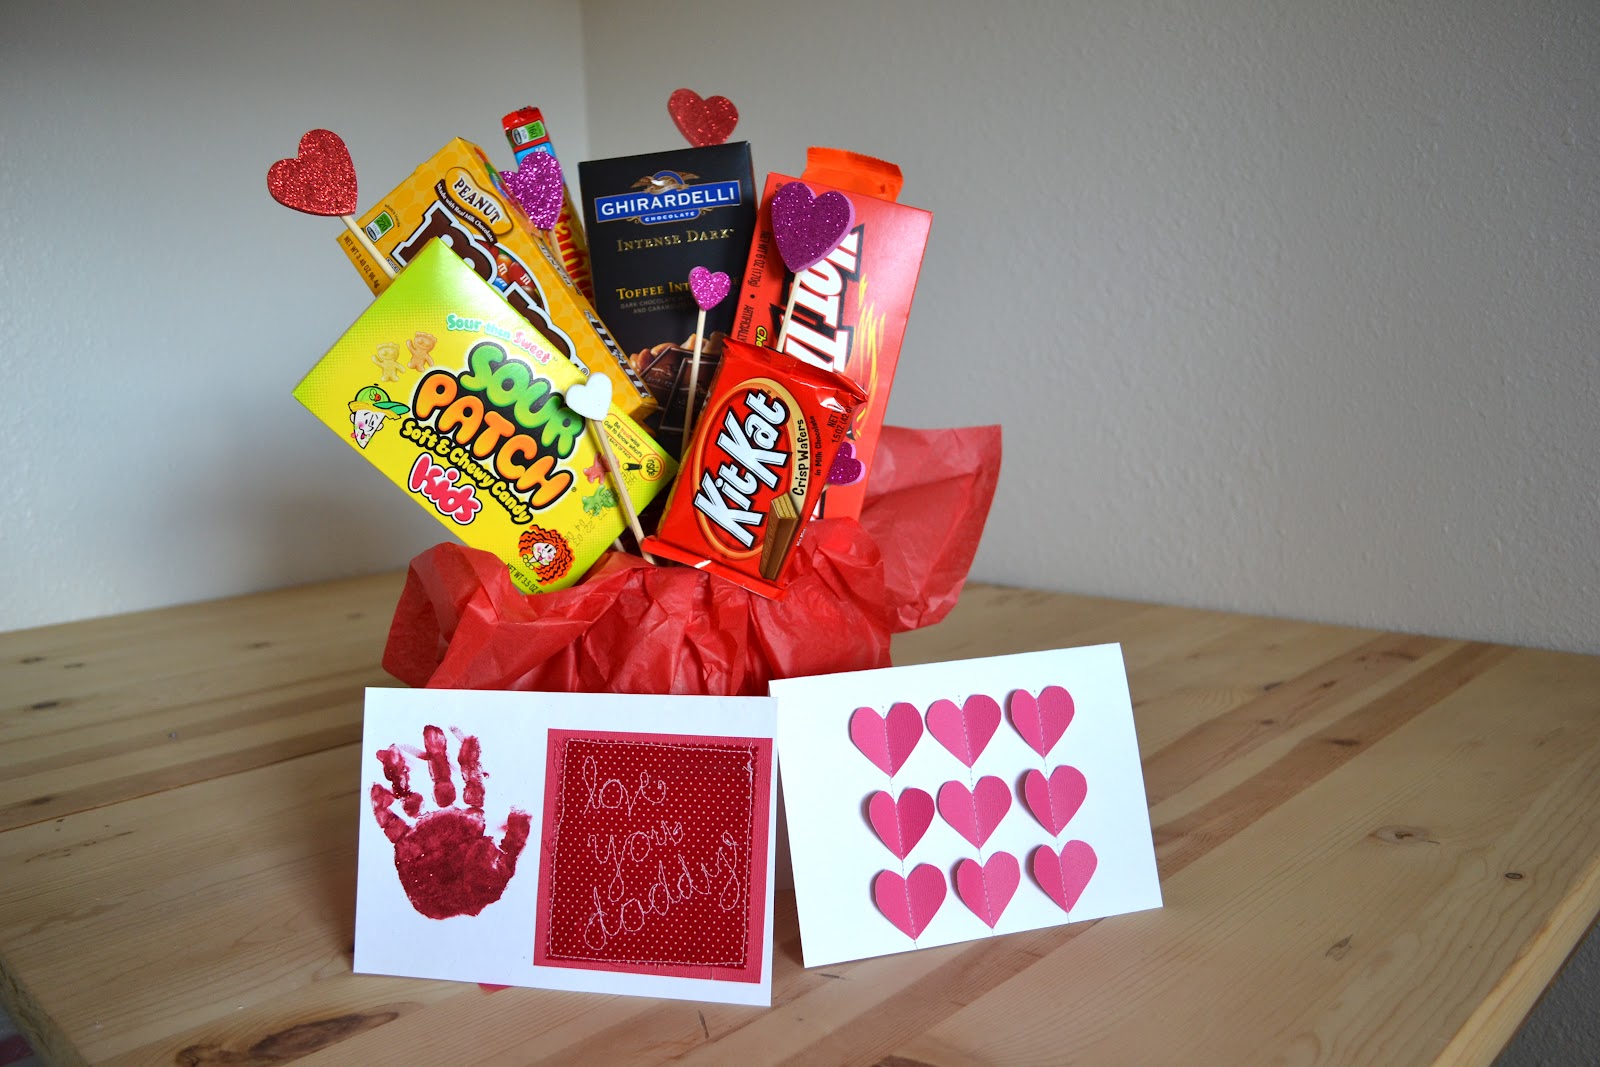
I slapped this stuff together in less than an hour for Valentine's tomorrow. It's also Rob's birthday, so I love spoiling him. I thought these were cute ideas, while still keeping it pretty inexpensive.

 I just whipped this baby up. I thought a handprint would be fun, and glitter always makes it more fun. I sprinkled it on when it was wet. Then I just sewed the fabric scrap on. I used my embroidery foot and lowered my feed dogs in my sewing machine to write the words. It's not perfect, but I like it that way. It looks more like Annie wrote it I think :)

I originally saw the idea for this here. She gives a great tutorial. 

 This is how you get the threads from coming loose. Just pull the strings through to the other side of the card, then dab a bit of glue to hold them in place. I was thinking I could have covered this with a piece of card stock, because it looks a little messy, but I doubt Rob will even notice. 

 You could do a candy bouquet in a million different ways.  We did these over at a friends house the other night, and some of the ladies had canisters, or vases, or cool valentines cups (you can find them at Wal-Mart or the Dollar store). They decorated with scrapbook paper, ric rac, ribbon. I kept it simple in a mason jar. Very manly, I might say.

I put a foam cone in the bottom of the jar, then filled it with tissue paper. Then just skewer or hot glue your favorite candy, and add some decorations and that's it. You could do other little toys, or love notes or whatever. 

Happy Valentines! Hope you all get to spend it with someone you love!